2. Investigations
Just when we began
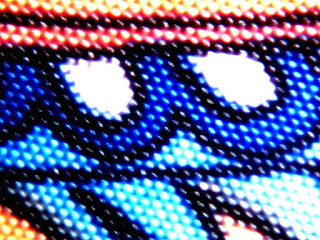
to produce, the first product idea Cecilia and I had was using microscopes to
get images and patterns that can be used as prints for different products or
just as inspiration.
We got really
interesting ones using leaves, plant cells, the pattern on a coat and the
buttons on a tv remote.
We ended up with almost
geometrical patterns and organic shapes combined with really bright colours
that seemed to go in perfect combination with the brief and our group ideas.
Some of these pictures were made into a collection of coasters.
Some of these pictures were made into a collection of coasters.

Then I began to
develop various ideas I got from different artists mainly found on Pinterest.
These ideas vary
from:
-Fingerprint designs:
they combine some bright colours from our palette and also have an added element of 'bit map', one of the key examples given for the brief.
-Skull illustrations:
They're made with fine lines and using pointillism technique.
I used skulls in this illustrations because they are an element from the natural world that fits very well with this brief as it shows a more rough side of the animal.

-Macro photography:
I've been doing macro photography for a few years now and so I always get inspiration from it and I wanted to try and bring it into the brief.
I thought the best way was to take photographs of literal elements from nature and then use these as prints to go on products, as I did with the coasters I made.
Some of them have a twist, like editing the fruits to a colour that isn't their natural one.
They are suppossed to be printed on a hard material and have a thin glass fitted on top.

-Laser cutting coasters:
This collection of coasters is made from the leftover pieces of Alex's laser cutting coasters.
We thought it was a good idea to recycle them, so the fact that we are working with laser cutting acquires an environmentally friendly aspect by not discarding any spare parts.
The pieces were put together using a hot glue gun and in a way that the glue is invisible to the eye so it looks like they stick together by themselves.
At first they didn't have any colouring, but after our first presentation to the tutors they suggested that we added some so it would look more like our brief.
When I added the bright colours we all agreed on leaving some of them without any coloured pieces so it would look like 'sudden bursts' which is the aim in our whole product range.

-White clay coasters:
This coasters are quite different from the previous ones I had made, but once again I wanted to integrate the natural in my production. The coasters have prints on the surface created by pressing different plants on it. I quite liked them without any colour but I knew that to fit with our brief and out collection the needed a burst of colour on them and so I painted them with the brightest ones on our colour palette.
The 'Layout and Objects' workshop the tutors organised in March helped us get the idea to make a photo shoot ourselves later on when we had a final number of products, to show how they look together as a collection rather than just put together separate images of each one.
Also we remembered from that photo shoot that making as many combinations with different objects as possible is better than not making enough. This way you can find that a combination you wouldn’t have done works really good together.


